


Step-by-Step Guide: How to Install a 3362 Potentiometer for Optimal Performance
Category: Knowledge
Time: 2024-08-15
Summary: Step-by-Step Guide: How to Install a 3362 Potentiometer Table of Contents 1. Introduction to 3362 Potentiometers 2. Understanding the Basics of Potentiometers 3. Essential Tools for Installation 4. Step-by-Step Installation Process 5. Wiring the 3362 Potentiometer Correctly 6. Testing the Potentiometer After Installation 7. Common Troubleshooting Tips 8. Conclusion
Step-by-Step Guide: How to Install a 3362 Potentiometer
Table of Contents
- 1. Introduction to 3362 Potentiometers
- 2. Understanding the Basics of Potentiometers
- 3. Essential Tools for Installation
- 4. Step-by-Step Installation Process
- 5. Wiring the 3362 Potentiometer Correctly
- 6. Testing the Potentiometer After Installation
- 7. Common Troubleshooting Tips
- 8. Conclusion
- 9. Frequently Asked Questions
1. Introduction to 3362 Potentiometers
The **3362 potentiometer** is a versatile and widely-used component in various electronic devices. It allows users to adjust voltage levels, providing flexibility in circuits. Understanding how to install this component effectively can significantly enhance the performance and functionality of your projects.
2. Understanding the Basics of Potentiometers
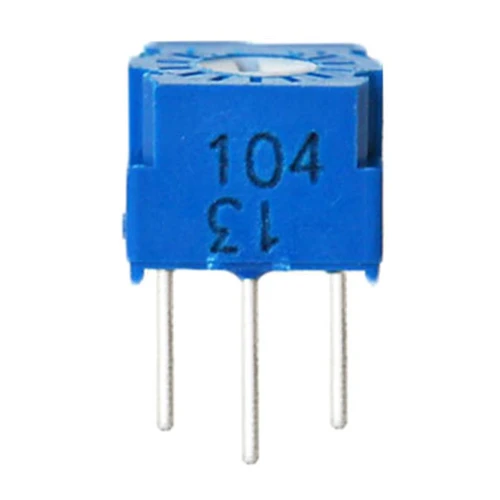
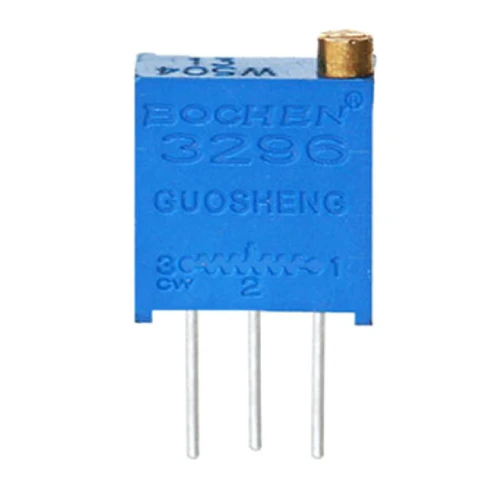
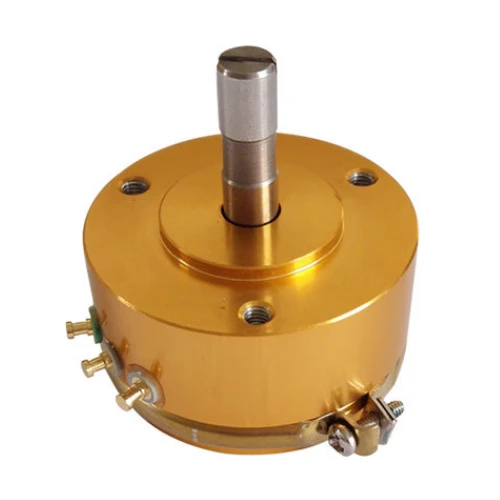
A potentiometer is a three-terminal resistor with an adjustable center tap. It functions as a variable resistor or voltage divider, allowing users to control the amount of voltage or current passing through a circuit. The **3362 model** is particularly favored for its compact size and reliability, making it suitable for both professional applications and DIY projects.
The Anatomy of a 3362 Potentiometer
The 3362 features a circular body with three terminals:
- **Terminal A**: Connected to one end of the resistive element.
- **Terminal B**: Connected to the other end of the resistive element.
- **Wiper (Terminal C)**: Moves along the resistive element, providing the variable output voltage.
Types of Potentiometers
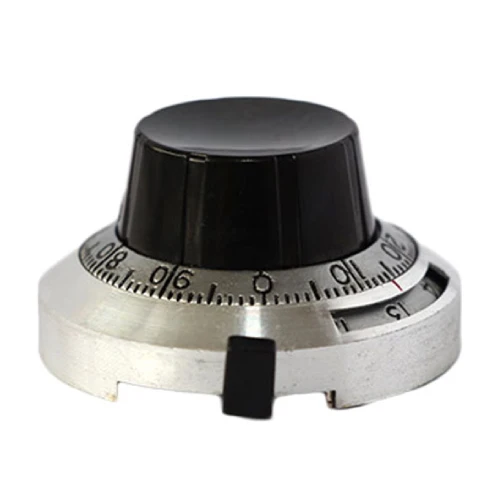
Potentiometers come in various types, such as rotary, linear, and digital. The 3362 is typically a rotary potentiometer, which allows for smooth adjustments through a knob, making it user-friendly.
3. Essential Tools for Installation
To successfully install a **3362 potentiometer**, you will need the following tools:
- **Soldering Iron**: For secure connections.
- **Solder**: To join electrical components.
- **Wire Strippers**: To prepare the ends of your wires.
- **Multimeter**: For testing the potentiometer.
- **Screwdriver Set**: To attach or detach any mounting screws.
- **Heat Shrink Tubing** (optional): For insulation and protection of connections.
4. Step-by-Step Installation Process
Installing a 3362 potentiometer is a straightforward process when following these systematic steps.
Step 1: Gather Your Components
Ensure you have all necessary components ready, including the potentiometer, wires, and any tools mentioned earlier.
Step 2: Power Off Your Device
Before starting any work, make sure the device is completely powered off to avoid electrical hazards.
Step 3: Remove the Old Potentiometer (if applicable)
If you are replacing an existing potentiometer, carefully desolder the old one. Use the soldering iron to heat the joints, and gently pull the component out once the solder melts.
Step 4: Prepare the New Potentiometer
Take the new 3362 potentiometer and inspect its terminals. Ensure they are clean and free from debris.
Step 5: Connect the Potentiometer
- **Solder Terminal A**: Connect this to the input voltage source.
- **Solder Terminal B**: Connect this to the ground.
- **Solder Terminal C**: This will be your output, connecting to the circuit where the variable voltage is needed.
Step 6: Secure the Potentiometer
If necessary, mount the potentiometer in the designated housing or panel. Use screws or brackets to secure it firmly in place.
5. Wiring the 3362 Potentiometer Correctly
Proper wiring is crucial for optimal performance. Here’s a detailed look at how to wire the potentiometer correctly:
Understanding Potentiometer Wiring
Potentiometers can be wired in various configurations, depending on their application:
- **Voltage Divider Configuration**: Connect Terminal A to the positive voltage, Terminal B to ground, and Terminal C to the load.
- **Variable Resistor Configuration**: Use Terminal A and C for a variable resistor setup, while Terminal B is left disconnected.
Common Wiring Diagrams
Refer to wiring diagrams specific to your application to ensure correct connections. Diagrams can be found in the component’s datasheet or online resources.
6. Testing the Potentiometer After Installation
Once installed, testing the potentiometer is essential to ensure it functions correctly.
Using a Multimeter
- Set your multimeter to measure resistance.
- Connect the probes to Terminal A and C; you should see variable resistance as you turn the knob.
- Check Terminal A and B, and Terminal B and C for proper connections.
7. Common Troubleshooting Tips
Even with careful installation, issues may arise. Here are some troubleshooting tips:
Issue 1: No Output Voltage
- Check all connections to ensure they are secure.
- Verify that the power source is functional.
Issue 2: Erratic or No Adjustment
- Inspect the potentiometer for damage.
- Test with a multimeter to confirm functionality.
Issue 3: Physical Damage
- Look for signs of wear or breakage. If the potentiometer is damaged, it will need to be replaced.
8. Conclusion
Installing a **3362 potentiometer** can significantly enhance your electronic projects’ functionality. By following this detailed step-by-step guide, you ensure a proper installation and a better understanding of this critical component. With the right tools and techniques, even novice users can successfully incorporate potentiometers into their designs.
9. Frequently Asked Questions
What is the purpose of a potentiometer?
A potentiometer is used to adjust voltage levels in a circuit, allowing for variable resistance and control of electronic signals.
Can I use a 3362 potentiometer in any circuit?
The 3362 is versatile but ensure its specifications match your circuit requirements regarding voltage, current, and resistance.
How do I know if my potentiometer is functioning correctly?
Testing with a multimeter will indicate whether it’s providing variable resistance as expected.
What happens if I connect the potentiometer incorrectly?
Incorrect connections may lead to device malfunction or damage. Always follow wiring diagrams specific to your application.
Is it necessary to solder the connections?
While soldering provides a secure connection, you can use terminal blocks or other connectors for temporary or prototyping setups.
By leveraging this comprehensive guide on installing a **3362 potentiometer**, you can ensure a successful integration into your electronic projects, enhancing both performance and reliability.
Keywords: Step-by-Step Guide: How to Install a 3362 Potentiometer for Optimal Performance
Related Information
Company news
-
People's Representative Newspaper - Guosheng Technology: With innovation as the lead, explore the road to a powerful country
Time:2023-03-21
-
Green low-carbon integrity demonstration establishment enterprise - Chengdu Guosheng Technology Co., Ltd.
Time:2023-03-21
-
Chengdu Guosheng Technology Co., Ltd. has been awarded as the "Vice President Unit of Sichuan Good Partner Elite Club"
Time:2023-02-21
-
Good news: Chengdu Guosheng Technology Co., Ltd. has won the 2022 Chengdu Social Responsibility Brand Award
Time:2023-02-21
-
Chengdu Guosheng Technology Co., Ltd. was awarded the "Excellent Brand" award in the 2022 Sichuan Entrepreneurs Brand List.
Time:2023-01-18
-
Chinese Communist Party of Chengdu Guosheng Technology Co., Ltd. Branch was established
Time:2017-12-20
-
Guosheng Science and Technology began "to implement the norms of intellectual property management" start the work
Time:2017-12-10
-
Chengdu Guosheng Technology Co., Ltd. to declare the "high-tech enterprises" first instance passed
Time:2017-12-10
-
My company's products much favored customers
Time:2014-05-14
Knowledge
-
Understanding Trimmer Potentiometers: Essential Insights for Electronics Professionals
Time:2024-10-16
-
Top Applications of Trimmer Potentiometers in Modern Devices
Time:2024-10-08
-
Understanding Trimmer Potentiometers: A Comprehensive Guide for Professionals
Time:2024-10-07
-
Understanding Trimmer Potentiometers: A Comprehensive Guide to Adjustable Resistance
Time:2024-10-06
-
Understanding Trimmer Potentiometers: Essential Insights for Electronics Professionals
Time:2024-10-05
-
How to Properly Use a 3296 Potentiometer for Optimal Performance
Time:2024-10-04
-
Understanding the Versatility and Applications of the 3296 Potentiometer
Time:2024-10-03
-
Top Applications of the 3296 Potentiometer in Modern Electronics
Time:2024-10-02
-
Unlocking the Potential of 3296 Potentiometers: Essential Insights for Electronic Enthusiasts
Time:2024-10-01
-
Mastering Circuit Adjustments with 10K Trimmer Resistors: A Comprehensive Guide
Time:2024-09-30
-
Understanding the Importance of Trimmer 10k Potentiometers in Electronic Applications
Time:2024-09-29
-
Why 10K Trimmer Resistors Are Essential for Your Electronic Projects
Time:2024-09-28
-
Understanding the Role of the Trimmer 10K in Electronic Components
Time:2024-09-27
-
Innovative Uses for the 3362 Potentiometer in DIY Electronics
Time:2024-09-26
-
Understanding the 3362 Potentiometer: Applications and Benefits in Electronic Components
Time:2024-09-25
-
The Impact of Temperature on the Performance of the 3362 Potentiometer: An In-Depth Analysis
Time:2024-09-24
-
Understanding the 3362 Potentiometer: A Comprehensive Guide for Electronic Applications
Time:2024-09-23
-
A Deep Dive into the Benefits of Using Trimmer 3296 in Circuit Design
Time:2024-09-22
-
Understanding Trimmer 3296: A Comprehensive Guide for Professionals
Time:2024-09-21
-
Exploring the Versatility of the Trimmer 3296 in Potentiometer Applications
Time:2024-09-20
-
Understanding the Trimmer 3296: A Comprehensive Guide for Electronic Component Enthusiasts
Time:2024-09-19
-
Maximize Efficiency: Selecting the Right Trimming Potentiometer for Your Applications
Time:2024-09-18
-
Understanding the 3262W Trimmer: Essential Insights for Professionals
Time:2024-09-17
-
Discover the Advantages of Utilizing Trimmers in Electronic Circuits for Optimal Performance
Time:2024-09-16
-
Understanding the 3262W Trimmer: A Comprehensive Guide for Electronic Components
Time:2024-09-15
-
Enhancing Precision Technology: The Impact of Rotary Encoders and Digital Potentiometers
Time:2024-09-14
-
Understanding Rotary Encoders and Digital Potentiometers: A Comprehensive Guide for Professionals
Time:2024-09-13
-
Revolutionizing Electronic Interfaces with Digital Potentiometers and Rotary Encoders
Time:2024-09-12
-
Understanding the Benefits of Rotary Encoder Digital Potentiometers in Electronics
Time:2024-09-11
-
Mastering the Art of Precision Control with WH138 Potentiometers: A Comprehensive Guide
Time:2024-09-10
-
Understanding the WH138 Potentiometer: A Comprehensive Guide for Professionals
Time:2024-09-09
-
The Evolution of WH138 Potentiometers: From Analog to Digital Age
Time:2024-09-08
-
Understanding WH138 Potentiometers: Key Features and Applications
Time:2024-09-07
-
The Impact of 800W Resistors on Circuit Efficiency and Stability
Time:2024-09-06
-
Understanding the Significance of 800W Resistors in Electronic Components
Time:2024-09-05
-
800W Resistors: Innovating Power Distribution in Electronic Devices
Time:2024-09-04
-
Understanding 800W Resistors: Key Insights for Your Electronic Projects
Time:2024-09-03
-
Day 50: Innovative Ways to Use 6mm Potentiometer Knobs in Your Projects
Time:2024-09-02
-
Day 51: Mastering Precision Control with 6mm Potentiometer Knobs - Unlocking Ultimate Performance
Time:2024-09-01
-
Day 52: Elevate Your Electronics with Stylish 6mm Potentiometer Knobs
Time:2024-08-31
-
Unlocking the Potential of Your Devices with 6mm Potentiometer Knobs: A Comprehensive Guide
Time:2024-08-30
-
Why Choosing the Right Potentiometer Matters: A Comprehensive Exploration of W503 Models
Time:2024-08-29
-
Understanding the W503 Potentiometer: A Key Component in Electronics
Time:2024-08-28
-
Unlocking Precision: The Versatile Applications of W503 Potentiometer
Time:2024-08-27
-
Understanding the W503 Potentiometer: A Key Component in Electronics
Time:2024-08-26
-
Top 5 Benefits of Using Trimmers in Circuit Design: Elevate Your Electronic Projects
Time:2024-08-25
-
Understanding the Role of Trimmer Resistors in Electronic Applications
Time:2024-08-24
-
Unlocking Precision: How Trimmers Revolutionize Electronic Components
Time:2024-08-23
-
Understanding the Trimmer 100k: A Comprehensive Guide to Potentiometers
Time:2024-08-22
-
Why the Trimmer 3296 is Essential for Your Electronic Projects
Time:2024-08-21
-
Understanding the Functionality and Importance of Trimmer 3296 in Electronic Components
Time:2024-08-20
-
Unlocking the Potential of the Trimmer 3296: A Comprehensive Guide to Precision and Performance
Time:2024-08-19
-
Understanding Trimmer 3296: A Comprehensive Guide to Potentiometers
Time:2024-08-18
-
Mastering the 3362 Potentiometer: Essential Tips and Best Practices for Effective Design
Time:2024-08-17
-
Understanding the 3362 Potentiometer: A Key Component in Electronics
Time:2024-08-16
-
Step-by-Step Guide: How to Install a 3362 Potentiometer for Optimal Performance
Time:2024-08-15
-
Understanding the 3362 Potentiometer: A Key Component in Electronic Circuits
Time:2024-08-14
-
Unlocking the Potential of Your Circuit: How 10K Trimmer Resistors Work
Time:2024-08-13
-
Understanding the Role of Trimmer 10k Potentiometers in Electronic Circuits
Time:2024-08-12
-
10K Trimmer Resistors: The Ultimate Guide to Precision Tuning
Time:2024-08-11
-
Understanding the Importance of the Trimmer 10K in Electronic Components
Time:2024-08-10
-
Why the 3296 Potentiometer is a Must-Have for Your Electronics Toolkit
Time:2024-08-09
-
Understanding the 3296 Potentiometer: A Key Component in Electronic Applications
Time:2024-08-08
-
Unlocking the Versatility of the 3296 Potentiometer in Electronic Circuits
Time:2024-08-07
-
Understanding the 3296 Potentiometer: A Comprehensive Guide for Electronics Enthusiasts
Time:2024-08-06
-
Why Trimmer Potentiometers are Essential for Circuit Calibration
Time:2024-08-05
-
Understanding Trimmer Potentiometers: Essential Insights for Electronics Professionals
Time:2024-08-04
-
Unlocking Precision: The Role of Trimmer Potentiometers in Electronics
Time:2024-08-03
-
Understanding Trimmer Potentiometers: A Guide for Electronics Enthusiasts
Time:2024-08-02
Industry information
-
Extrusion process with the mold and extrusion die how to choose
Time:2017-12-20
-
Talking about the Cable Security Level of Wiring Specification
Time:2017-12-20
-
Discussion on High Voltage XLPE Insulation Power Cables
Time:2017-12-20
-
Discussion on Irradiation Crosslinked Power Cables
Time:2017-12-20
-
Talking about superconducting cable compared with conventional cable has the following advantages
Time:2017-12-20
-
Cable detection technology
Time:2017-12-20
-
Identify the quality of the cable can be started from a few simple ways
Time:2017-12-20
-
Factors Affecting RTD Temperature Sensor Measurement
Time:2017-12-18
-
Commonly used low-voltage cables have what
Time:2017-12-18
-
Talking about the cloth wire knowledge
Time:2017-12-18
-
2014 China's electronic components industry welcome development opportunities
Time:2014-05-24